Week 2: Modeling & Sculpting
We are going to learn how to model and sculpt in Blender, an awesome free-and-open-source 3D creation application!
Here are some things you might be able to make after the next few weeks. (These took me several hours each)
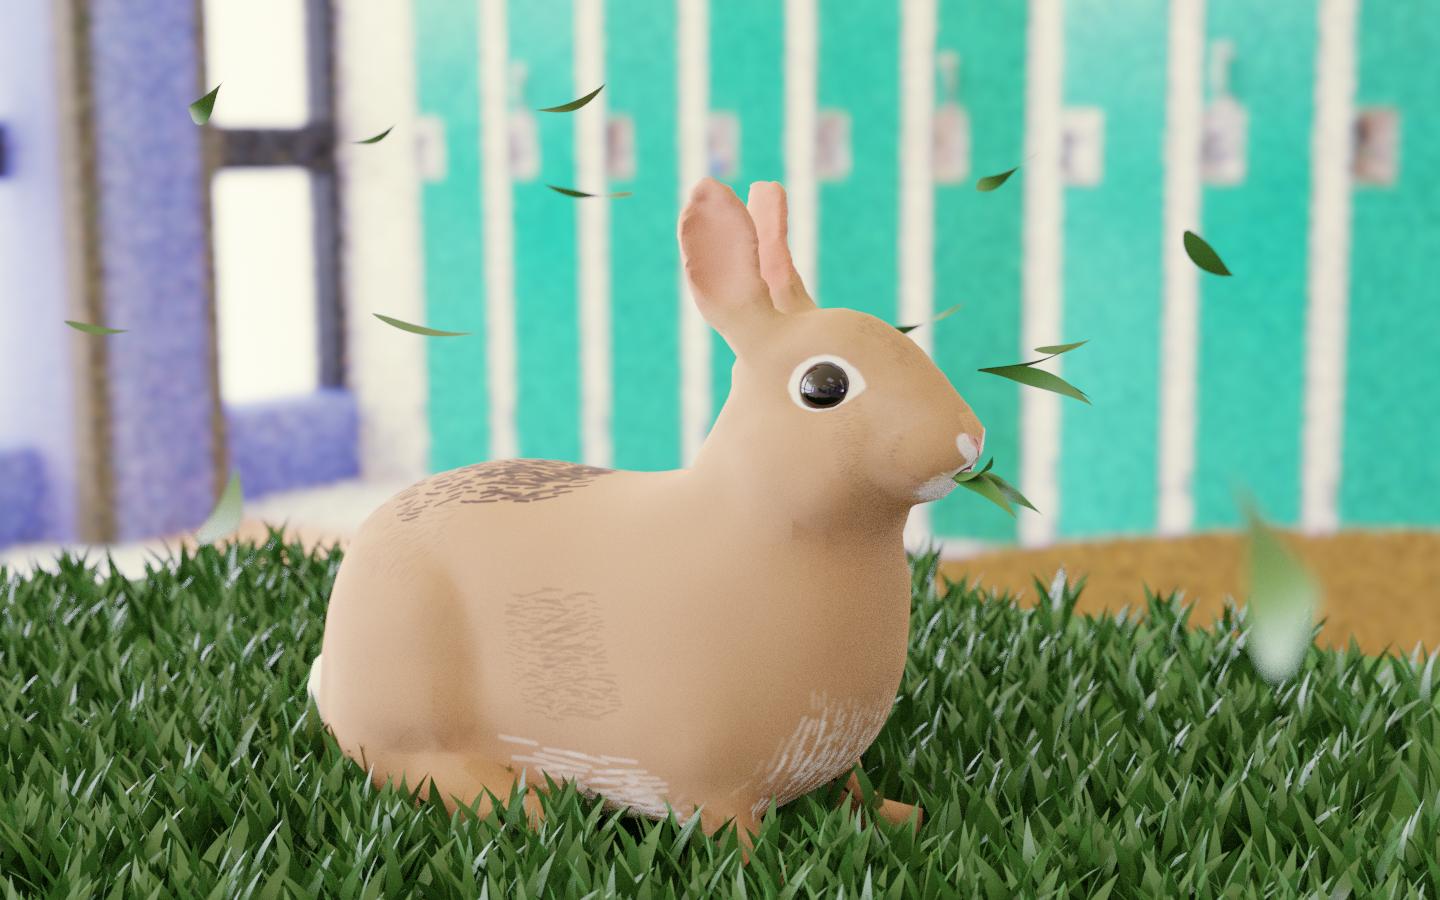

Of course, you can do many other things, like dragons, plants, clothes, landscapes, etc.
Intro to Blender
To start, download and install the program from the Blender homepage.
Note: I'm using version 2.80, but you can use the newest version and there shouldn't be any major differences.
When you first open Blender, there is a menu in the center. You can select New File > General to create a new project.
There is a cube in the center. Now to the controls:
- Middle-click and drag to rotate
- Shift+middle-click and drag to pan
- Left-click to select
- Right-click for a context menu
Note: if you don't have a mouse or a middle-click button you can follow the steps in this short article to use left-click and Alt/Shift/Ctrl keys.
Select the cube so it has a yellow outline.
- Press G and move the mouse to translate the cube (click to finish). You can also press G, X, 1, Enter to translate the cube 1 meter along the X axis.
- Press S and move the mouse to scale. You can type S1.5 Enter to scale by a factor of 1.5.
- Press R and move the mouse to rotate. Type RY45 Enter to rotate 45 degrees along the Y axis.
Now, a few concepts. Usually, 3D models are represented as a collection or mesh of connected 2D polygons. The mesh has vertices, edges, and faces that can be manipulated.
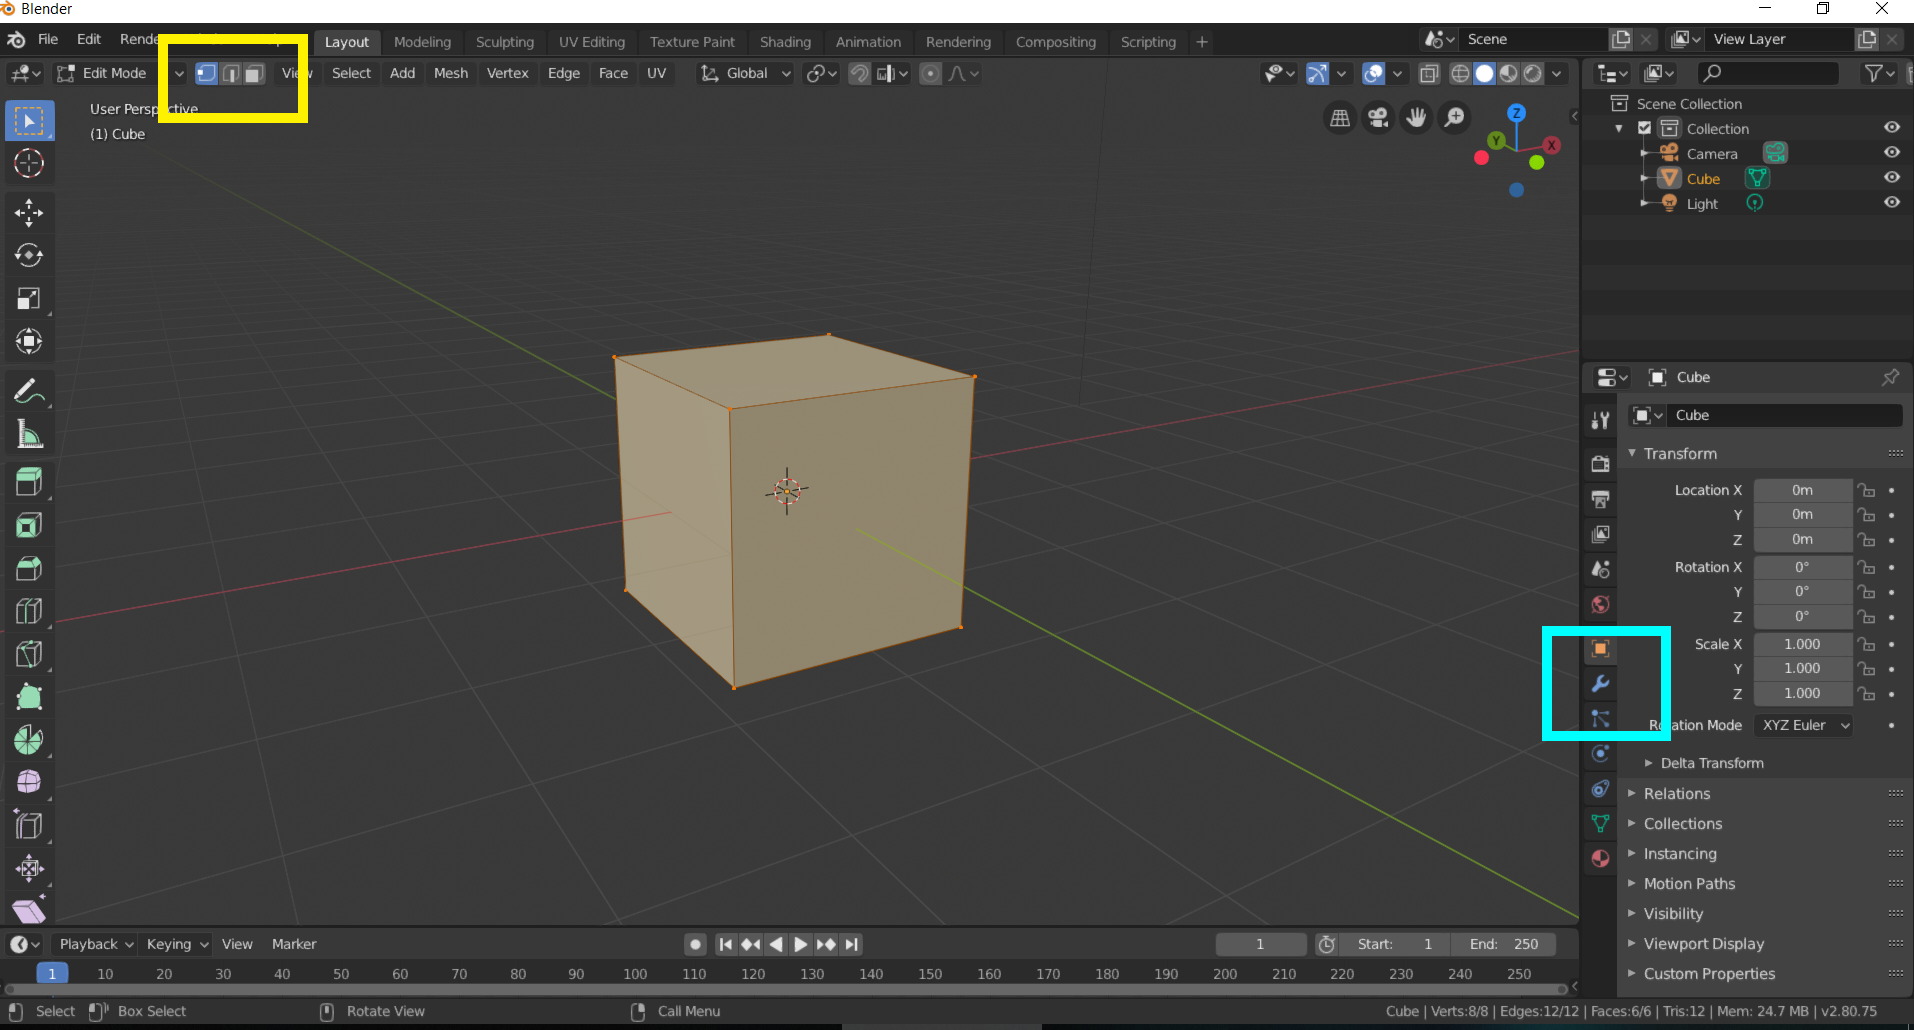
Select the cube. Now, if you press the Tab key, you'll enter Edit mode. This is where most geometric modelling work is done. On the left side there is a toolbar with many tools, if you hover mouse over them it will say what the tool is for. Notice the 3 buttons in the top left (in the yellow square in the picture below). These represent Vertices, Edges, and Faces. You can try picking one of the buttons and then selecting part of the cube to see which parts are selected.
Sculpting
Sculpting works on vertices, so to start we need to make some more vertices! Press Tab to exit the Edit mode (the top left should say Object Mode). Press Ctrl-5, and the cube should turn into a sphere.
Now, in the menu on the right side go to the Modifiers section (the wrench icon in the turquoise square shown above). You'll see that your Ctrl-5 created a Subdivision modifier. Click Apply. Now if you press Tab to go into Edit mode, you can see that we have lots of vertices. Now we can start sculpting!
Note: Blender 2.90 has a new sculpting mode (voxel sculpting), but I will go with the traditional sculpting mode for now.
At the top left of the screen (on the right of the yellow square above), there are tabs labelled Layout, Modeling, Sculpting, UV Editing, .... Click on the Sculpting tab and now you should see your cube-sphere in a somewhat shiny red material. Try clicking and dragging your mouse over the sphere.
You can Ctrl-click/drag to subtract and Shift-click/drag to smooth. Press F and move the mouse to change the size of the brush (can also be done in the right side menu).
Try out the many brushes on the left toolbar and see what they do!
One final thing: sometimes, you might need more vertices in a particular place. In this case, enable the Dyntopo option in the lower part of the right side menu. This will make more vertices as you zoom in.
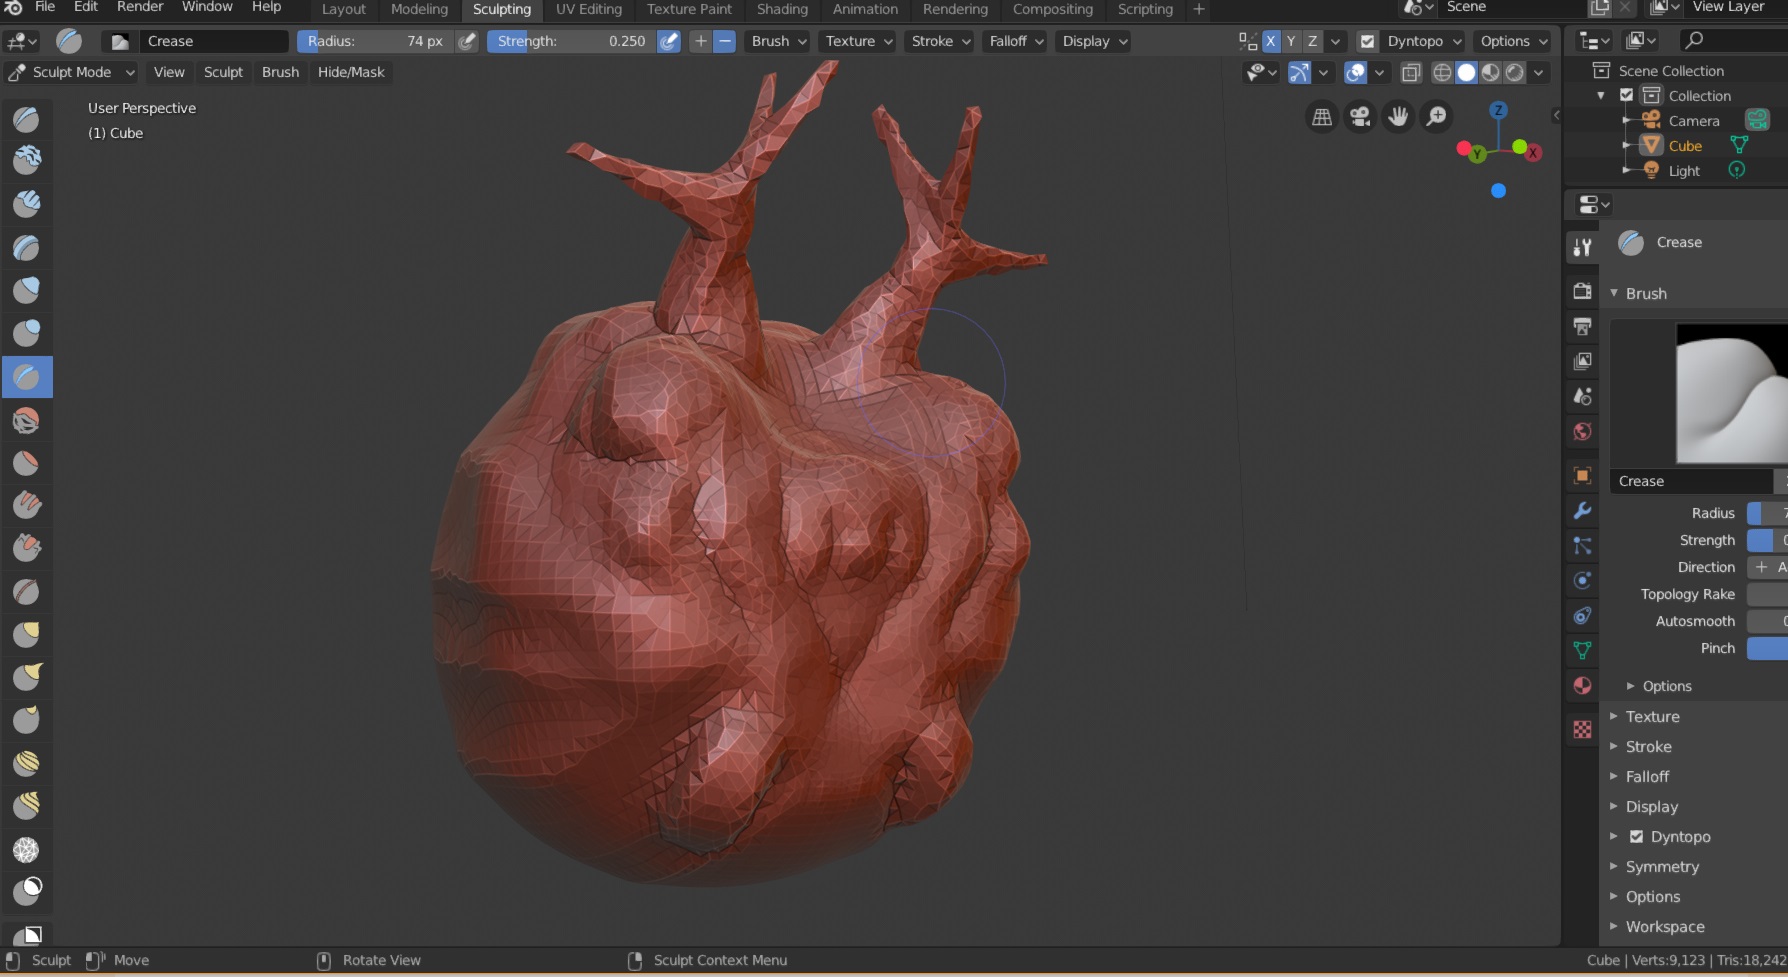
Messing around with brushes. What could this be? A bug Pokemon? A mini planet from The Little Prince?
That's it for this guide, now you can start exploring the huge world of digital sculpting!
Sculpting Resources
There are many many videos out there, here are a few good ones that I found. You don't have to watch all of them, but take a look at one to see what the environment looks like.
- Blender 2.81 | New Sculpting Features for Beginners - good clear tutorial
- Sculpting in Blender 2.8 | Every Brush - shows what the brushes do
- Introduction to Sculpting in Blender 2.8 - also shows brushes
If you want to make something, try searching for tutorials on how to sculpt humans, dragons, hair (!!), trees, etc. There are many videos of sculpting with other programs like ZBrush, the programs are very similar and you should be able to follow along in Blender.
Having experience with 2D drawing / art definitely helps when working in 3D, since many principles and techniques still apply.
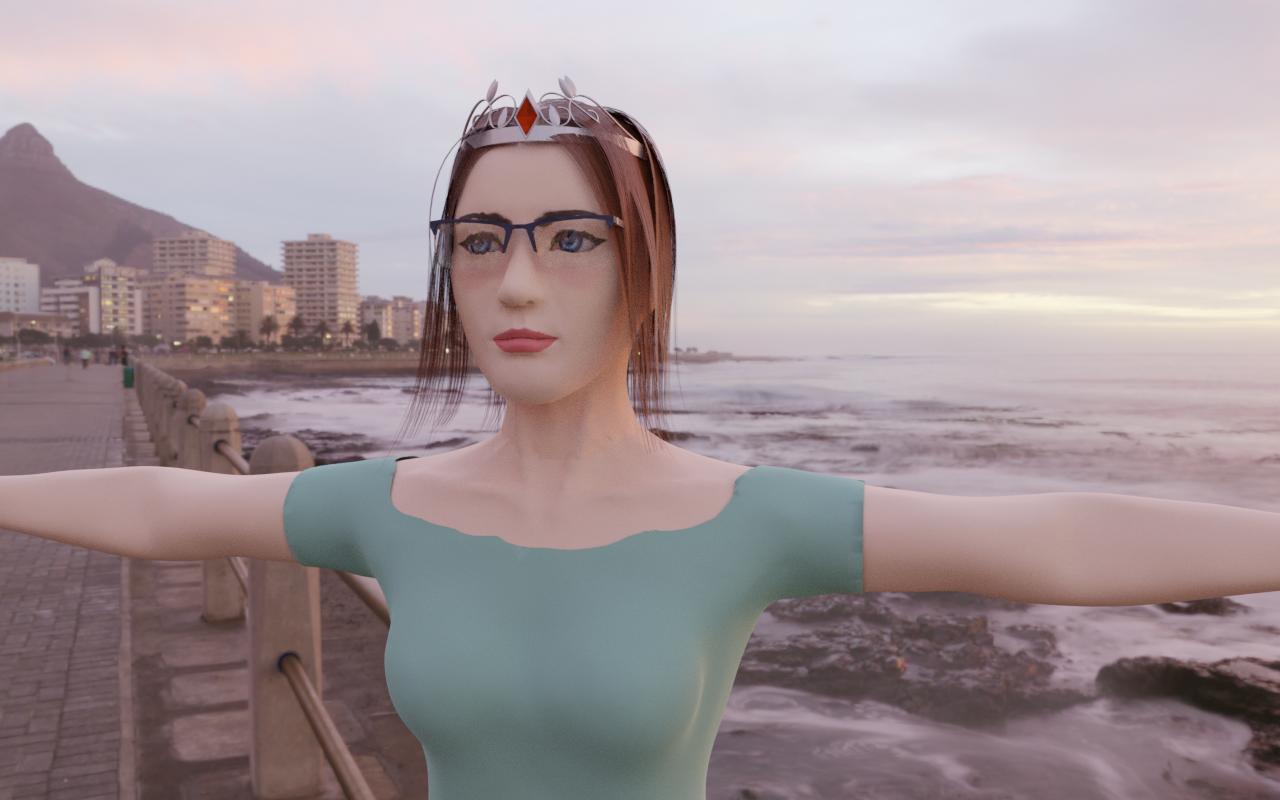
When I first decided to try sculpting I wanted to dive right in so I found and followed along with this video, how to model / sculpt a human head. My result didn't turn out super nice but it was okay. After I was comfortable with basic sculpting I decided to try making the rest of the body, just by looking at reference images. Eventually, I ended up with the image below. We'll get to texturing and materials in the future.
If you have any questions, just ask the mentors!
Modeling
There are several methods of geometric modeling.
Constructive Solid Geometry (CSG) uses boolean operators to merge and cut away shapes. It's just like mathematical set operations (union, intersection, difference).
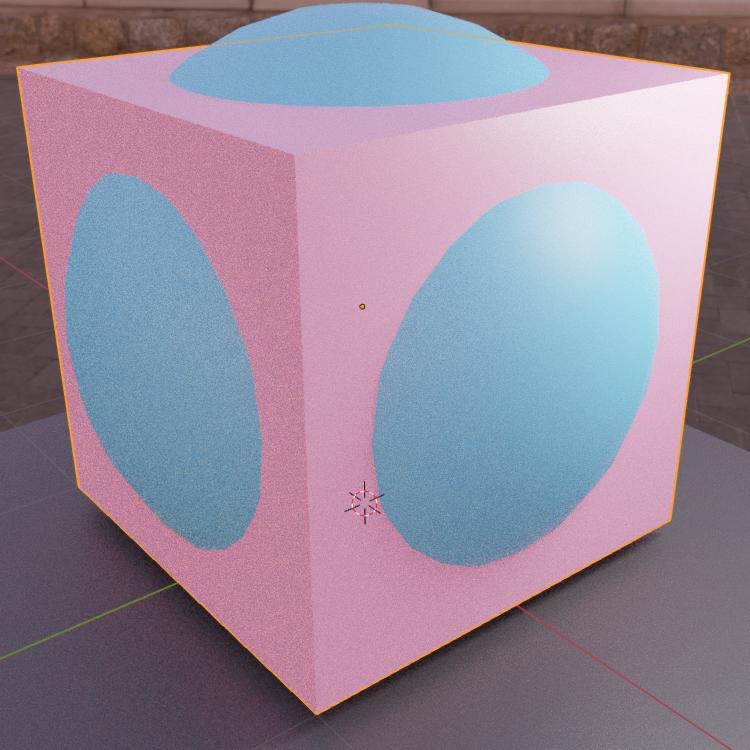
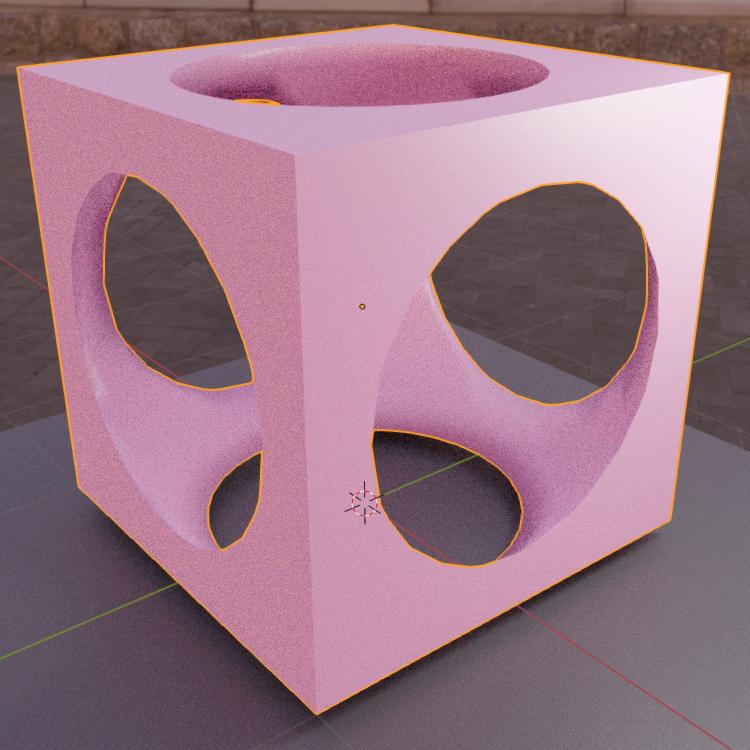
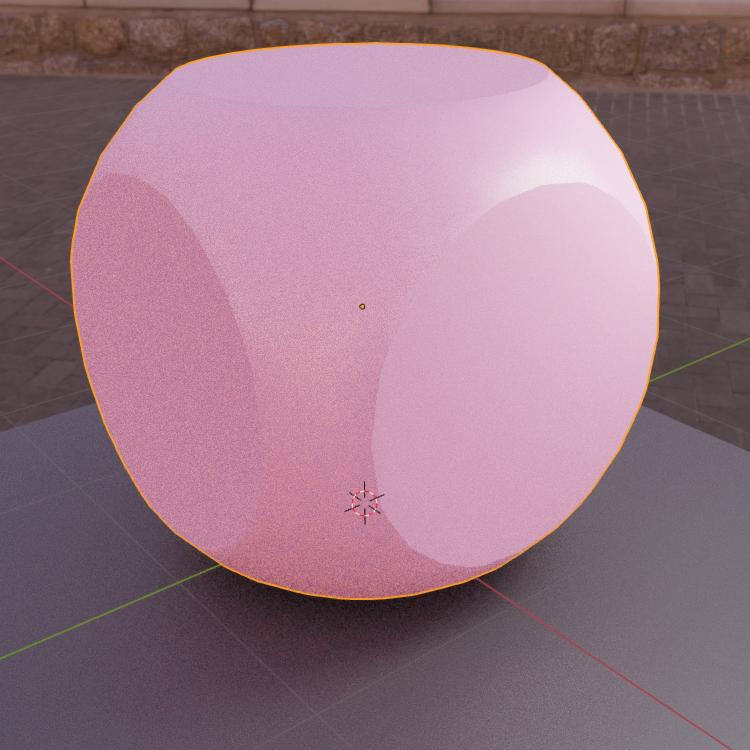
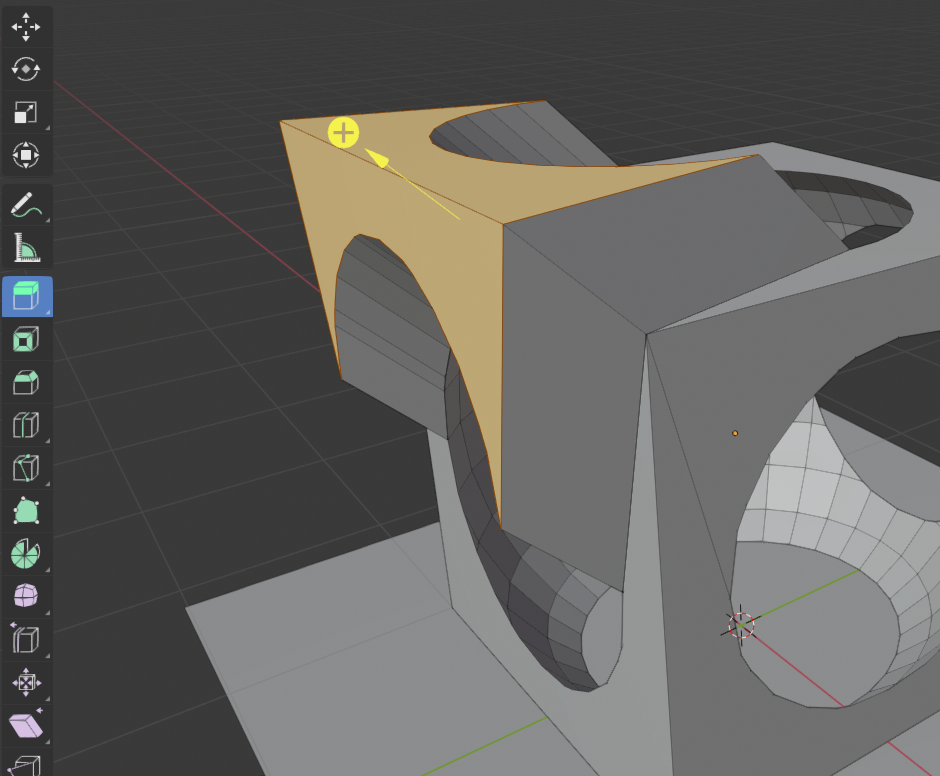
Below is an example of CSG. On the left, there is a cube and a sphere. If we subtract the sphere from the cube, we get the image in the middle. If we intersect the cube with the sphere, we get the image on the right.
In Blender, you can do this by adding a Modifier to a mesh.
You can make a new file, or continue with the sculpt you already have open. Go into the Layout tab and make sure you are in Object Mode.
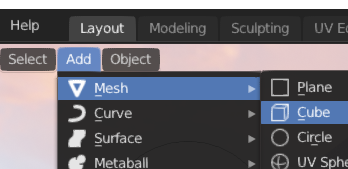
Now in the top left, click Add>Mesh>Cube (or you can also use a cone or torus if you want). This will show up in the middle of the screen.
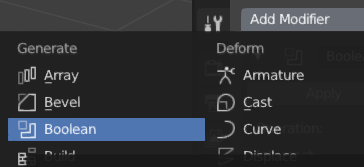
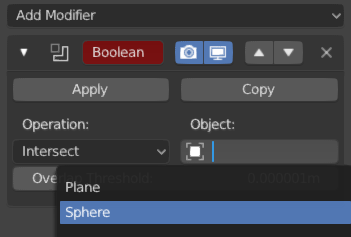
Now, like the subdivision for sculpting, go into the Modifiers section in the menu on the right. This time, pick the Boolean option. You'll notice that the title of the new modifier is in red, which means something's missing. The "Object" option looks empty, so click on it and choose an option. (if there aren't any options then add another cube/sphere/cone, etc).
Now, the two objects might be overlapping each other. In the upper right menu, each object should have an "eye" icon, if you toggle that then it will hide the object. Then you can see what shapes can be made!
When you're satisfied with your model, Apply the modifier (by clicking Apply in the modifiers menu) so that the changes propagate. See what you can do with more shapes!
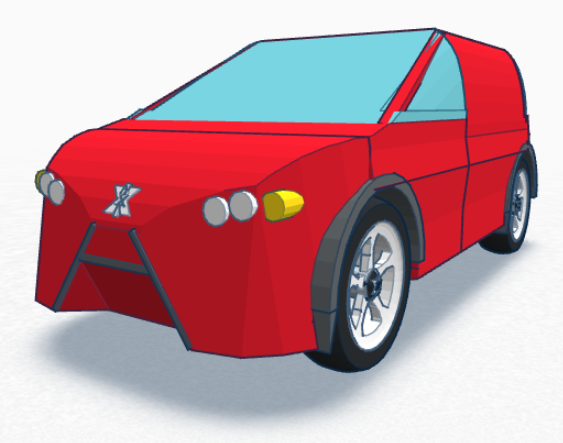
One of my earliest models was this vehicle thing, made in Tinkercad with only CSG and boolean operations:
Polygon Modelling
You can do many things with CSG, but often it's not enough. Instead, we can modify the faces, edges, and vertices themselves to get what we want.
Blender has a specific workspace for this, so go into the Modeling tab (make sure you've selected something first!).
First, try moving some vertices around. Select them and press G, move the mouse and click to drop. All the object controls apply here too!
Editing vertices directly is okay for small models, but unwieldy and impractical for more significant edits. Here is where the tools come in. It might be easier to use the Face select mode (3 icons in upper left). Select some part of the mesh and then click Extrude in the left toolbar. Alternatively, you can right click and select Extrude. Drag your selection along the arrow. Cool!
Now you can try the other tools in the left menu and experiment with them. In particular, the Edge Loop is used very frequently so try it out.
Curves
One very important part of modeling is having nice curves! There are a few special types of objects that represent smooth curves, including Bezier and NURBS (you don't need to know the differences between them). Let's see how these work.
You can either open a new file or continue from the previous one. Make sure you are in Object Mode. Click Add>Curve>Nurbs Curve. You'll see a thin curved line appear. If you press Tab to go into Edit Mode, you'll see some line segments around the curve. The points on these lines are called control points. Try selecting one and moving it around!
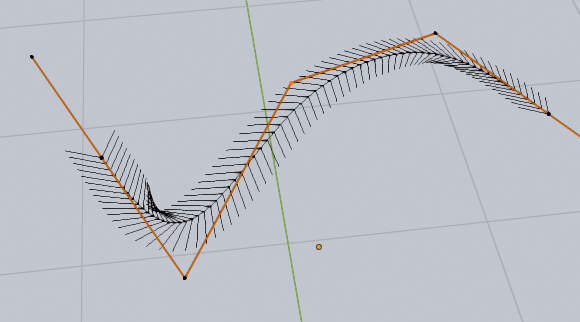
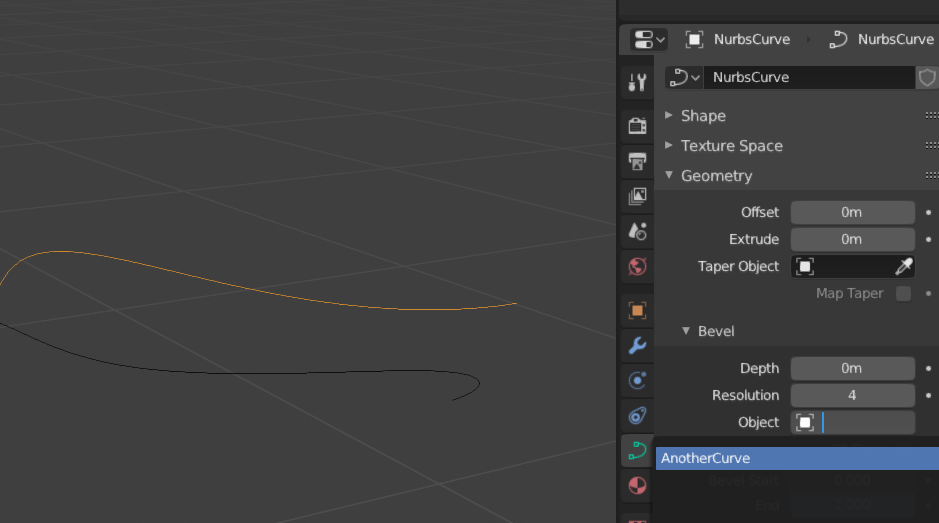
This is not exactly 3D yet, so go back into Object Mode (pressing Tab) and add another Nurbs curve. Scale this one down a bit. Now, select the first curve you made. In the right hand menu, under Geometry, there is a Bevel option. Click the Object box and select the option. There should now be a surface following the first curve, with the cross section of the second curve. If you don't see it, try zooming out. Now if you edit the second curve, you can see the effect that it has.
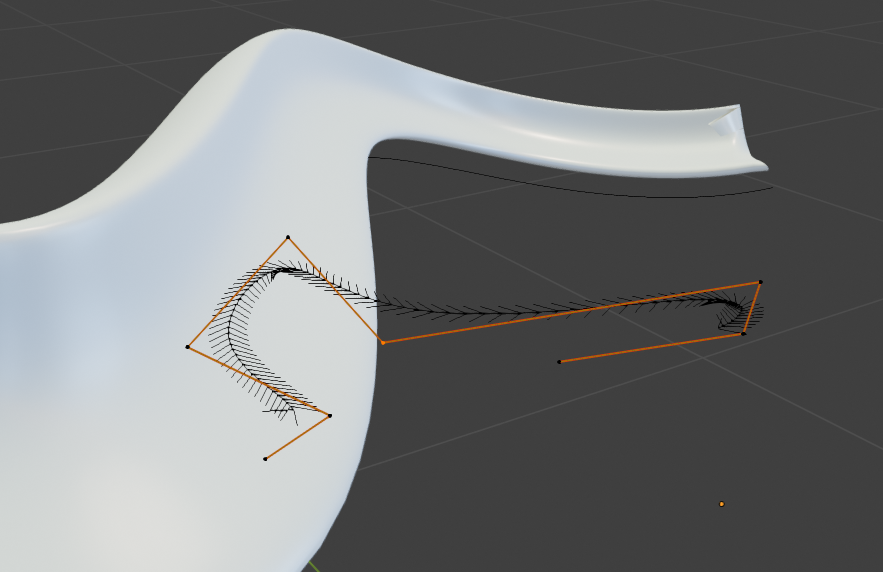
There is another option called Taper Object, that influences the width along the curve. With these you can try creating a waterslide or a leaf.
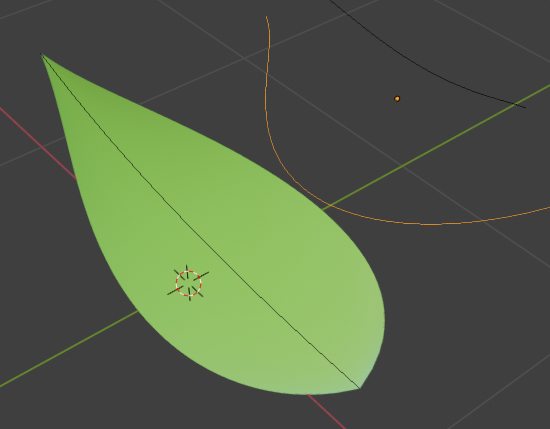
When combined together, all of these techniques can be used to make very cool things.
Modeling Resources
Geometric modelling is also called Hard Surface Modelling, if you search for that there will be many results.
Some ideas you can explore and search for: vehicles, musical instruments, weapons, architecture.
Here are a few videos I found, again no need to watch all of them (they're quite long), you can just choose one and try following along.
- Modeling a Sword - hands on tutorial
- Hard Surface Modeling Tutorial - multipart guide
- Making a 3D Lightsaber - User Interface - multipart, 1st part is a review of the basic controls we've covered already
- Making an Anvil - good, but older version 2.79
- Build a Rocket
Conclusion
Congratulations for making it this far! That's it for this week. Blender is a really great tool with a lot of features. Whatever you decide to make, it's good to have some reference images. If you want to see what is possible with sculpting and modelling, one of my favorite sites is Artstation, an incredible place for all kinds of 3D and 2D art.